Home > Resource Center > How-To Guides > How to Replace a Tennis Net Headband
How to Replace a Tennis Net Headband
Extend Equipment Life with Professional Headband Repair
Learning how to replace a tennis net headband is a cost-effective way to refresh a court without the expense of a full net replacement. While standard headbands feature double-stitching, high-performance replacements utilize quadruple-locked stitching to resist UV degradation and mechanical wear. This guide covers the process of overlaying a new vinyl or polyester headband to restore a professional appearance.
Understanding how to replace a tennis net headband is essential when the net body remains in excellent structural condition, but the top vinyl has frayed or the stitching has failed. A clean, white headband is not just an aesthetic requirement; it provides the high-contrast visual “top line” required by ITF Rule 1 for competitive play.
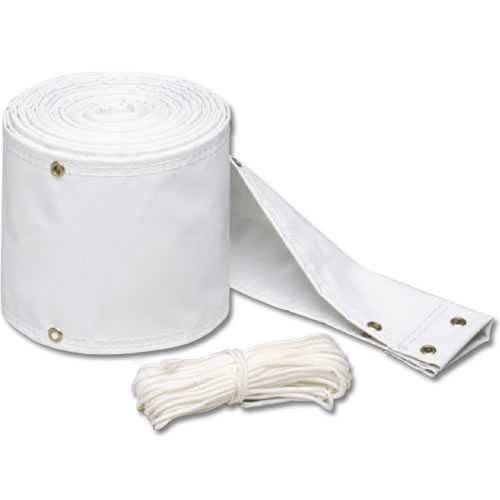
Figure 1: Proper lacing technique for a replacement tennis net headband.
When to Perform a Headband Repair
The decision on how to replace a tennis net headband usually stems from deteriorated stitching. Over time, UV radiation and ball impact can cause the threads to snap, causing the headband to separate from the mesh body. If your net body is a heavy-duty 3.0mm or 3.5mm braided polyethylene, the mesh will likely outlive the headband. In these cases, a replacement headband is the most sustainable choice.
Step 1: Alignment and Temporary Securing
Replacement headbands are designed to slide directly over the existing damaged material. You do not need to remove the original headband. To begin the process of how to replace a tennis net headband, drape the new material over the net. Cut two small pieces of lacing twine and secure the replacement at both ends to your net posts using the corner eyelets. This ensures the headband is centered and taut before you begin the permanent lacing process.
Step 2: Professional Lacing Technique
Once you are comfortable with the alignment, begin lacing the new headband to the existing mesh. Start at the second eyelet and work toward the opposite post. Use a high-strength lacing cord and pull firmly at every eyelet to remove slack. A loose headband can create “waves” along the top of the net, which interferes with proper ball play and net height measurements. Ensure the lacing cord passes through both the new eyelets and the original mesh for a secure bond.
Step 3: Verification and Height Check
After lacing is complete, verify the center height. According to USTA facility standards, the center height must be exactly 36 inches. Re-adjust your center strap if necessary, as the added thickness of the new headband may require a minor adjustment to your strap tension.
For clay courts, always choose a vinyl replacement headband. Vinyl is non-porous and resists the absorption of clay dust and algae, keeping your court looking brand new for several seasons.
Need a Replacement Headband?
Explore our heavy-duty vinyl and polyester headbands featuring quadruple-lock stitching.
Shop Replacement Headbands